
AList部署
部署AList
新建路径文件夹
1 | mkdir /www/wwwroot/alist.yumefusaka |
安装AList
1 | curl -fsSL "https://alist.nn.ci/v3.sh" | bash -s install /www/wwwroot/alist.yumefusaka |
2
3
4
5
6
7
8
9
10
11
12
# Install
curl -fsSL "https://alist.nn.ci/v3.sh" | bash -s install /www/wwwroot/alist.yumefusaka
# update
curl -fsSL "https://alist.nn.ci/v3.sh" | bash -s update /www/wwwroot/alist.yumefusaka
# Uninstall
curl -fsSL "https://alist.nn.ci/v3.sh" | bash -s uninstall /www/wwwroot/alist.yumefusaka
启动: systemctl start alist
关闭: systemctl stop alist
状态: systemctl status alist
重启: systemctl restart alist
修改密码
1 | cd /www/wwwroot/alist.yumefusaka/alist |
进入AList
开放安全组和防火墙后即可通过ip:5244访问AList
宝塔设置反向代理
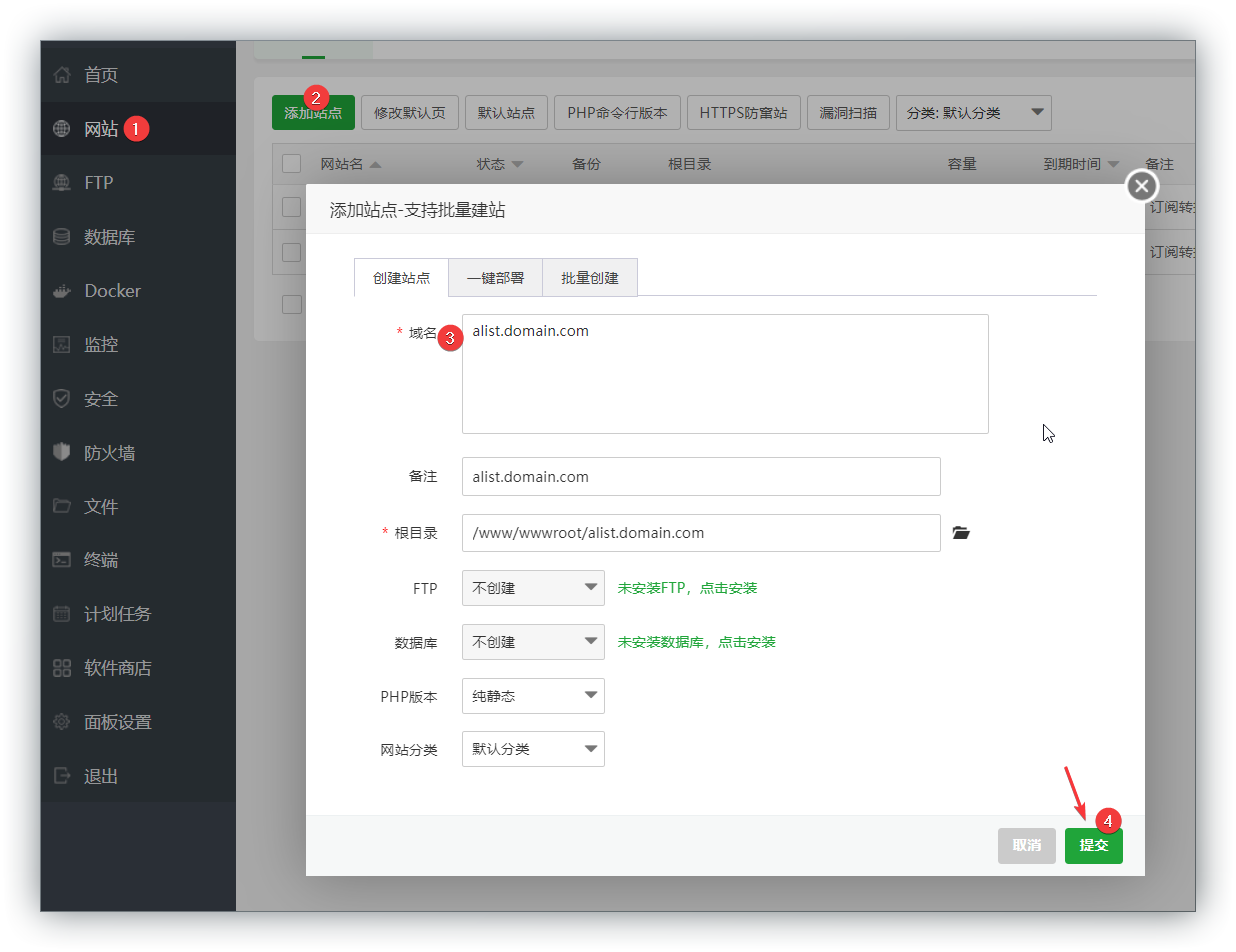
登录宝塔面板,添加站点
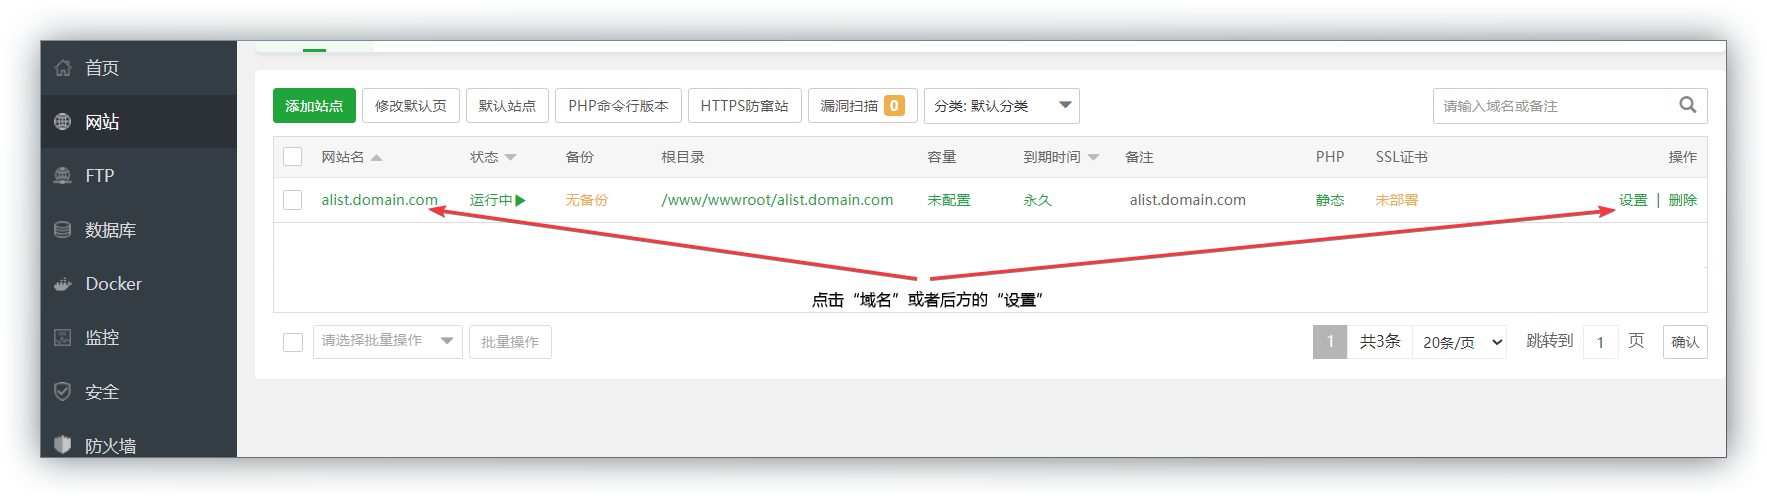
修改站点设置
删除面板默认代码
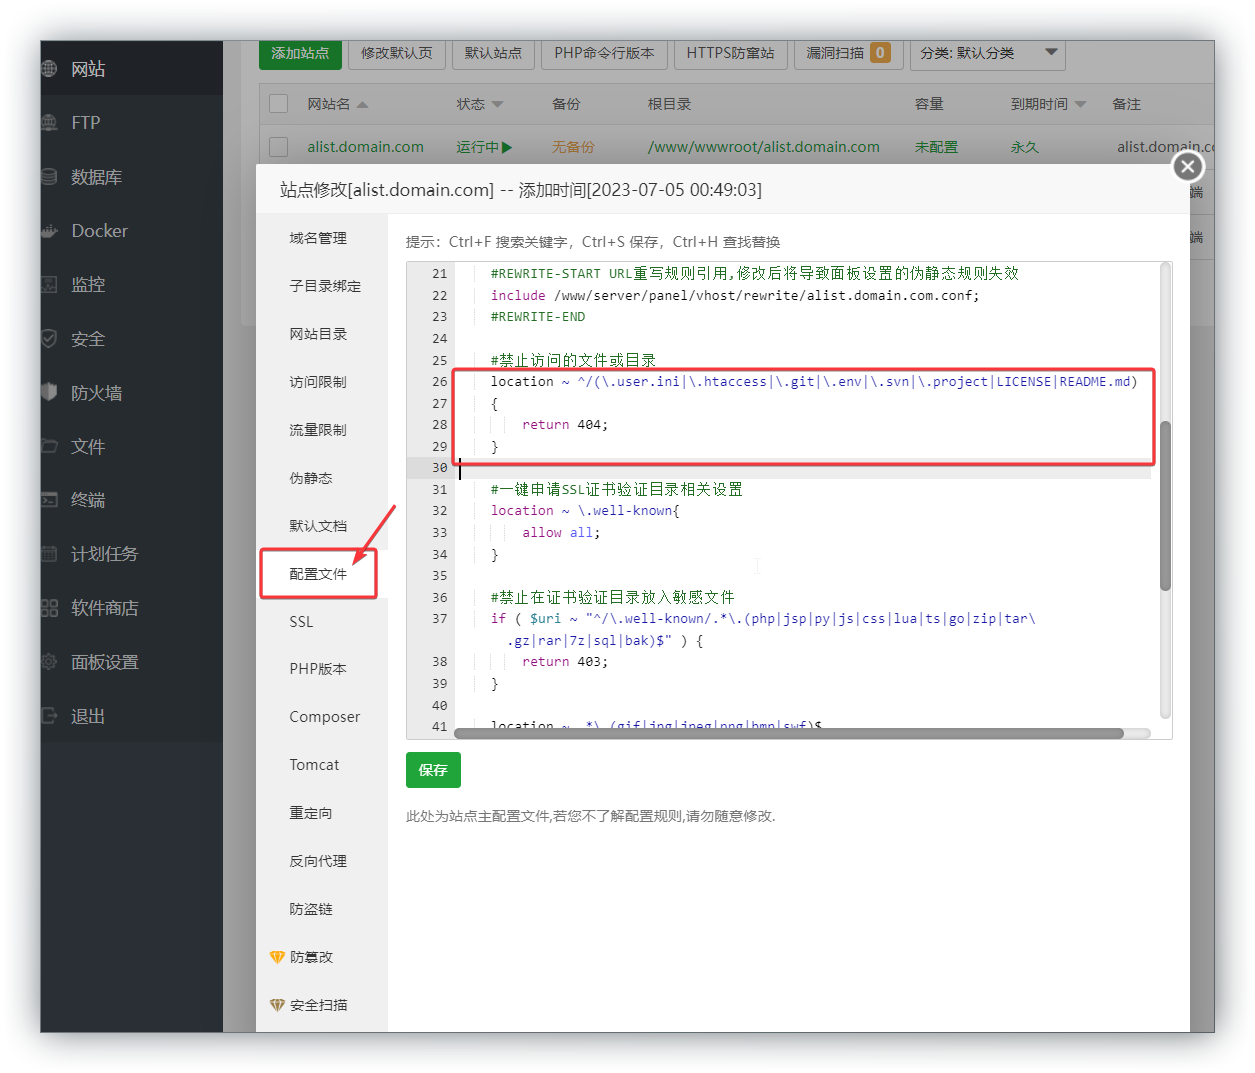
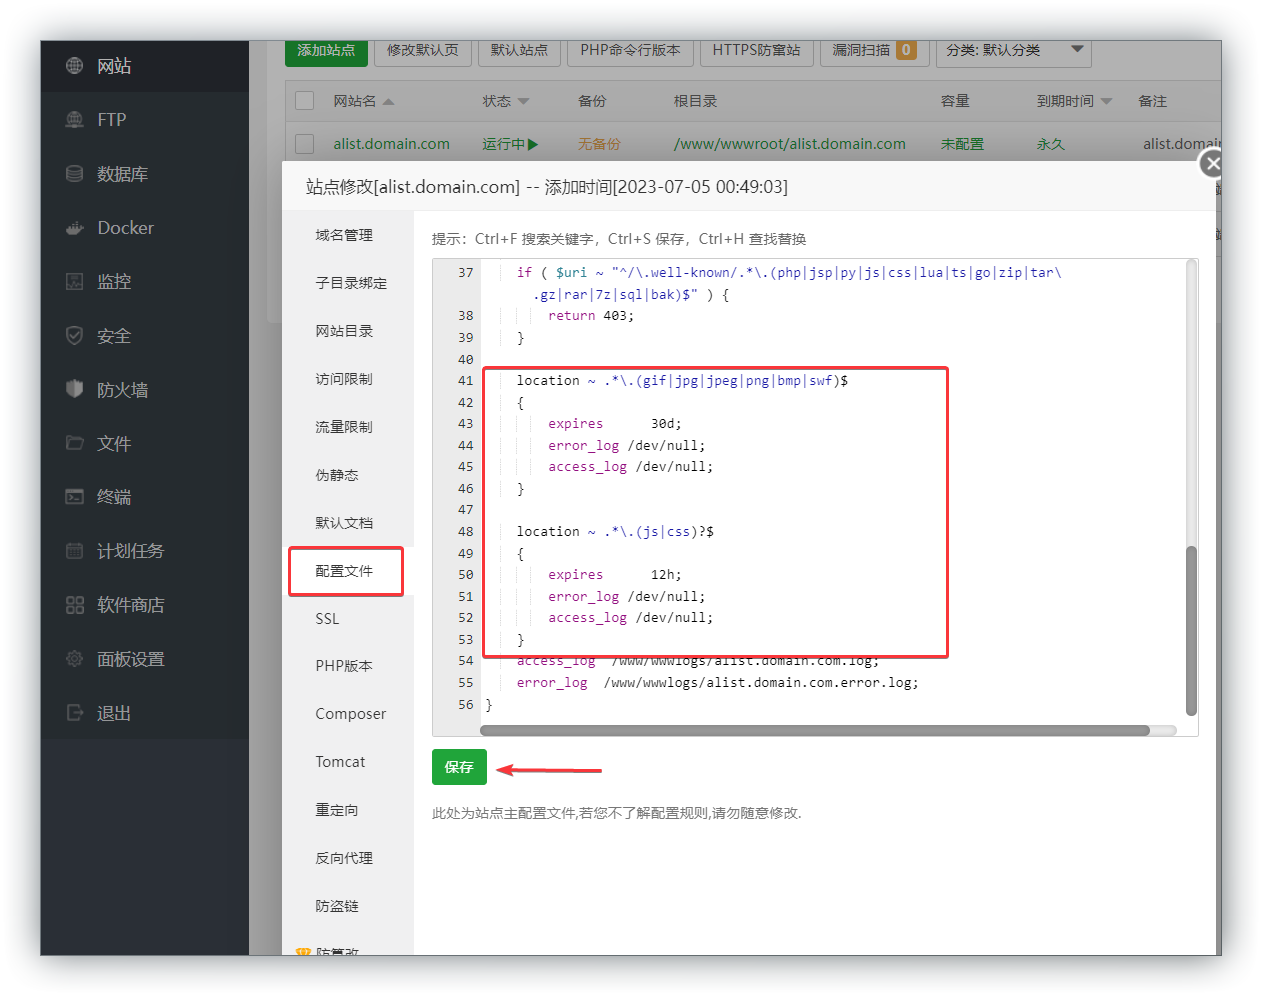
在网站配置文件的 server 字段中添加
1 | location / { |
如果需要使用HTTP/3,需要将对应HOST行修改为:
1 | proxy_set_header Host $host:$server_port; |
这样修改后的配置同时也可以兼容HTTP/2及更低版本的请求。
并在/www/server/nginx/conf/proxy.conf中或对应网站配置文件中设置禁用Nginx缓存,否则默认配置下访问较大文件时Nginx会先尝试将远程文件缓存至本机,导致播放失败
1 | proxy_cache cache_one; # 删除这一行 |
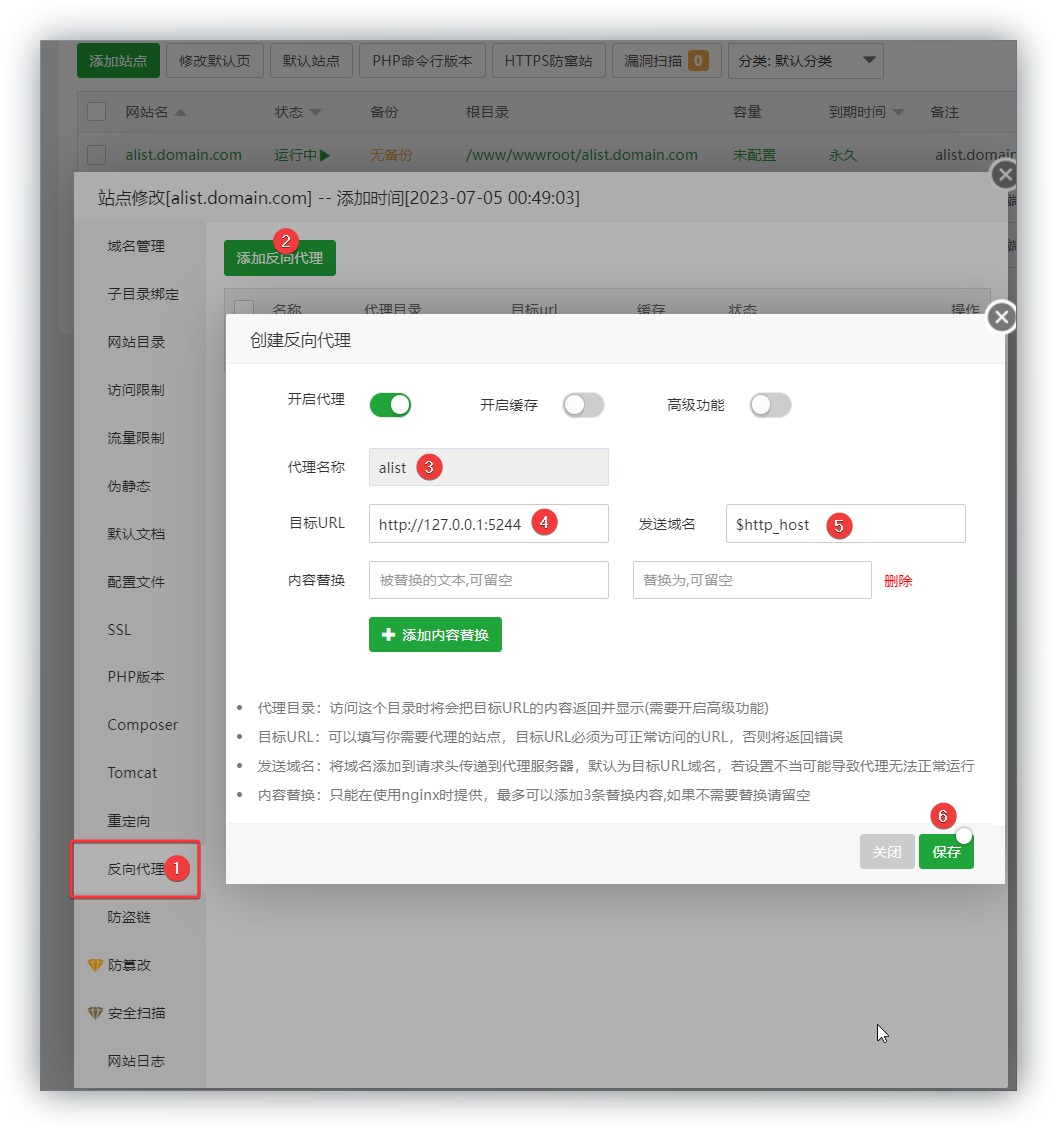
添加反向代理
完结撒花


评论