wsl安装

1
2
3
4
wsl --install
dism.exe /online /enable-feature /featurename:Microsoft-Windows-Subsystem-Linux /all /norestart
dism.exe /online /enable-feature /featurename:VirtualMachinePlatform /all /norestart
wsl --set-default-version 2

然后重启重启电脑!!!!wsl的安装就完成了。


安装Ubuntu子系统

列出可安装的系统版本

1
wsl.exe --list --online

image-20240504143749485

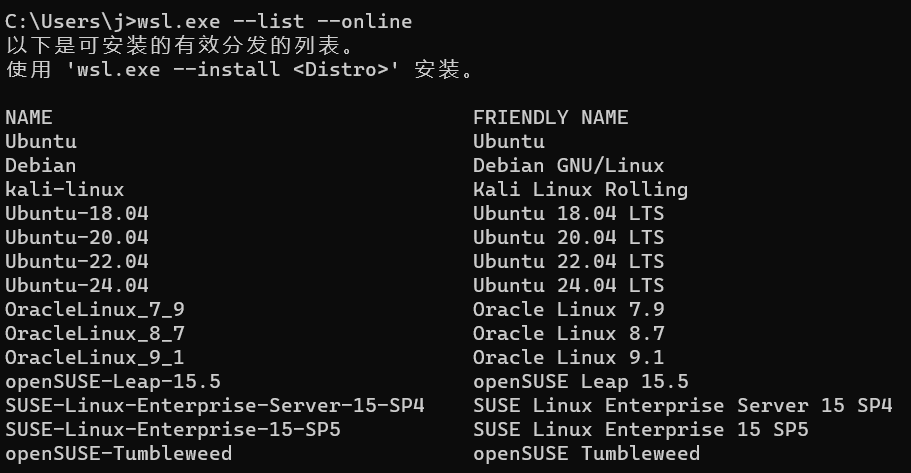
选择一个系统版本安装(这里我选择Ubuntu-24.04)

1
wsl.exe --install Ubuntu-24.04

安装好后设置账号密码即可


迁移Wsl至其他盘

列如这里我迁移到E:\Ubuntu下

导出子系统为tar包

1
wsl --export Ubuntu-24.04 E:\Ubuntu\Ubuntu.tar

注销子系统

1
wsl --unregister Ubuntu-24.04

导入子系统到指定文件夹

1
wsl --import Ubuntu-24.04 E:\Ubuntu E:\Ubuntu\Ubuntu.tar

成功导入后即可删除tar包


设置wsl2属性

需要Windows 11 23H2 或更高版本

设置网络模式为镜像模式

在镜像模式下主机可以直接通过localhost访问到wsl的端口

打开主机的 C:\Users{用户名} 目录,创建.wslconfig文件并写入

1
2
[experimental]
networkingMode=mirrored

以下还有其他的属性可以配置,请按需写入

1
2
3
4
5
6
7
8
9
10
11
12
13
14
15
16
# Settings apply across all Linux distros running on WSL 2
[wsl2]

# Limits VM memory to use no more than 4 GB, this can be set as whole numbers using GB or MB
memory=8GB

# Sets the VM to use two virtual processors
processors=8

[experimental]
autoMemoryReclaim=gradual # 开启自动回收内存,可在 gradual, dropcache, disabled 之间选择
networkingMode=mirrored # 开启镜像网络
dnsTunneling=true # 开启 DNS Tunneling
firewall=true # 开启 Windows 防火墙
autoProxy=true # 开启自动同步代理
sparseVhd=true # 开启自动释放 WSL2 虚拟硬盘空间

完结撒花